Learn what goes into a smooth, long-lasting concrete surface.
When you think of getting new concrete, you might imagine the simple act of pouring a gray mixture and letting it harden into what becomes your sidewalk or driveway.
However, the process is quite intricate and requires skill and precision to ensure the end product is strong, durable, and looks good.
In this article, we’re going to take a look at the process from start to finish. By the end, you’ll have a good idea of what it takes to achieve long-lasting concrete.

Step 1: Prepare the Site
Proper prep where the concrete will be poured is crucial to a durable slab.
Make a Plan
First, you’ll need to decide what you want the concrete to look like and what the final layout should be.
But before getting started pouring concrete, come up with a game plan for an important (but often overlooked) part of making sure your concrete stays around for good: drainage.
Proper drainage and downspout extenders that direct water away from the future concrete will help prevent it from settling in the future.
Start With a Clean Slate
After there’s a drainage plan in place, you’ll need to get to work clearing the area of any objects or debris, including grass, rocks, trees, and old concrete until only the soil is exposed.
Add Sub-Material
Next, a subbase is prepared to spread over the exposed soil. This subbase can be made from various materials, but granular fill is the most common.
In rare cases, extremely stable soil can be used directly (but we would almost always recommend against this).
Avoid Future Settling
The integrity of your concrete depends heavily on this subbase. If it shifts, so will your concrete. Therefore, starting with a solid base and tamping down the soil and sub-material is crucial to ensure a stable foundation.
Related Resource: Why Does Concrete Settle?

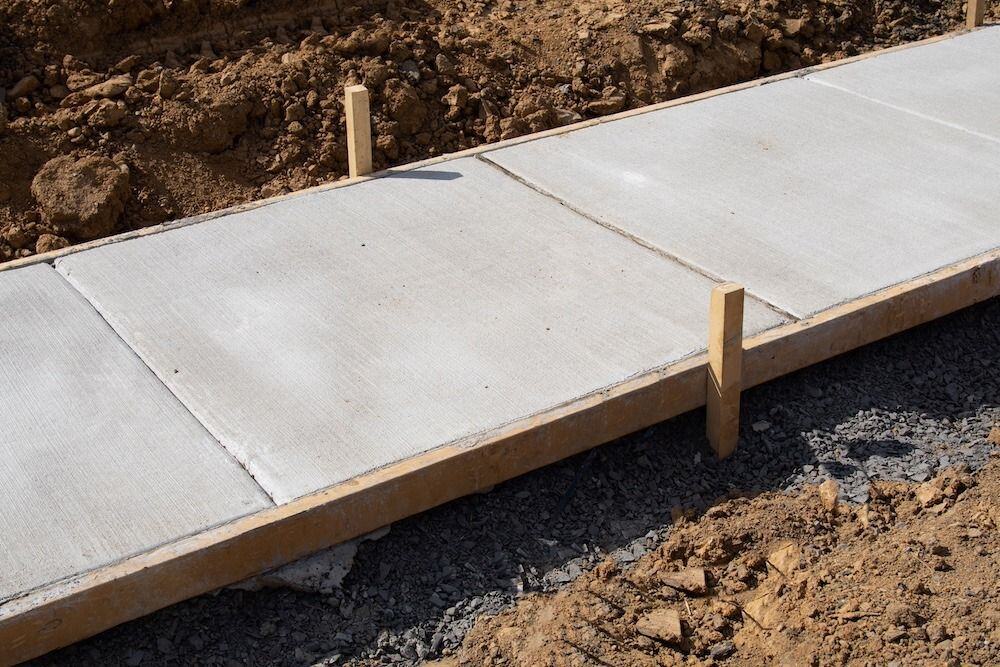
Step 2: Construct Concrete Forms
After preparing the surface, a form is constructed to hold and secure the concrete as it dries.
Forms are typically wooden perimeters secured by stakes, along with nails or screws. Skilled concrete contractors can create decorative forms with special shapes or specific slopes.
Add Reinforcements
Inside the form, fibers, wire mesh, or steel rebar are placed in strategic locations to add stability, enhance strength, and prevent cracks from spreading. This is especially important for high-traffic areas like driveways.
In some cases, concrete contractors will skip this step as a cost-saving technique. This is one of the many things to be aware of if or when comparing concrete quotes.

Step 3: Mix the Concrete
With the area and forms prepared, the next step is mixing the concrete. The basic formula includes one part cement, one part sand, and four parts coarse aggregate, like gravel.
Water is added to bind these ingredients together. While adding more water makes the mixture easier to work with, it weakens the final product – a drier mix is more crack-resistant.
Related Resource: What Is Concrete Made Of?
Concrete Mixing Trucks
Professional contractors typically order pre-mixed concrete, often called “Ready Mix,” which is combined at a concrete plant and loaded into a truck for delivery.
The concrete truck is designed to continue to mix the concrete, which is why you often see the spinning drums as you pass them on the road.
Smaller Concrete Mixers
For smaller projects where materials need to be combined on-site, professionals may use a concrete mixer to ensure the mixture has the right consistency and that all materials are fully combined.
You can mix concrete by hand in a wheelbarrow or mixing tub for small, one-off projects, but this can add a lot of work to the job.
Hardening Starts When Mixed With Water
Once the dry materials are mixed with water, the concrete will begin its hardening process.
Additives may be added to speed up or slow down the curing process or make it more workable for the installers depending on the temperature, weather, and site conditions on the day of installation.

Step 4: Pour the Concrete
Once mixed, the concrete is ready to be poured into the prepared forms. Depending on the location, the concrete might be poured directly from the truck or transported using compact loaders or wheelbarrows.
When done professionally, a team of contractors spreads out the concrete using shovels and a special concrete tool called a "come-along rake" to ensure even distribution.

Step 5: Screed and Float the Concrete
After pouring, the concrete is flattened using a screeding tool, which involves jiggling a wide board or similar straight edge across the top to create a flat surface. This step is crucial for achieving a smooth, even finish.
When screeding is complete, the concrete is floated with a bull float, which presses down the aggregate and brings the “cream,” or gravel-free concrete, to the surface. This step must be done quickly, as the concrete begins to set rapidly.

Step 6: Finish the Concrete
Concrete finishing involves these techniques:
Troweling
Various sizes and types of trowels are used to help achieve the best final surface possible. They can be used to perfect any defects in the smoothness left by the bullfloat.
Edging
Edging trowels can be used round over edges or where the slab meets up with an expansion joint for another slab.
Control Joints
To prevent cracking from temperature changes, control joints are created using a groover trowel.
Alternatively, control joints can also be cut into the concrete with a concrete saw blade the day after the concrete has been poured.
Control joint depth depends on the thickness of the concrete; in general, they should be cut about a quarter of the thickness of the concrete.
Traction
Additionally, traction can be added by sweeping a broom across the surface to make it less slippery when wet. For decorative finishes, concrete can also be stamped or patterned with a trowel.
Step 7: Cure and Seal the Concrete
The final step involves curing and sealing the concrete. Sealing should be done as soon as the concrete is poured and finished to help prevent cracking and discoloration.
The concrete is then left to cure, during which time it gains strength and durability.
Curing Time
The curing will continue for several days. Foot traffic should be avoided for 24 to 48 hours, and vehicle traffic should be avoided for approximately 7 days. The concrete should be fully cured after 28 to 30 days.
Pro Tip: Some sealers are specifically designed and intended for sealing early in the curing process and are referred to as “cure and seal” sealers.
For standard sealers, it is best to wait until after 28 days to apply the sealant or coating.
Should You Pour New Concrete?
Whether you decide to tackle a small project yourself or hire professionals for a larger one, knowing the whole process ensures a better outcome and a longer-lasting concrete surface.
However, in many cases, new concrete isn’t necessary. Instead, repairing the concrete you already have can save you lots of time and money, and can look great, too.
Is your existing concrete suffering from any of these six common problems? Learn about how you can repair them to avoid replacement: 6 Common Concrete Problems and How To Fix Them
Topics: