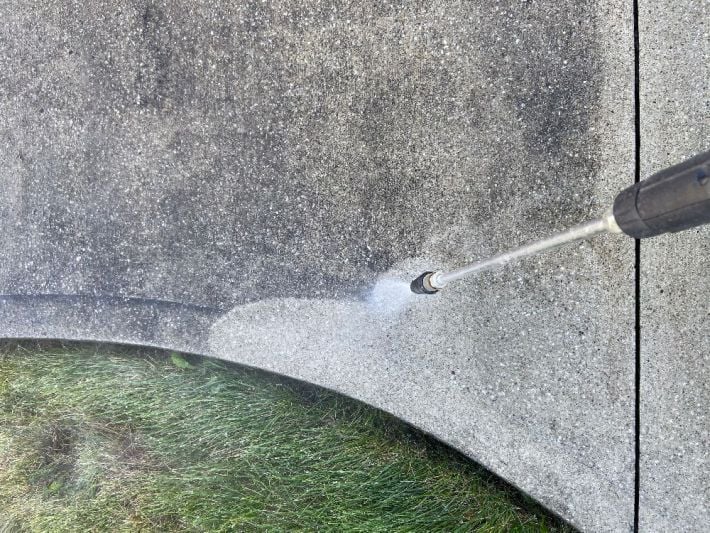
Learn everything you need to know about the concrete cleaning process.
Clean concrete is less susceptible to damage from mold, mildew, and salt, which can deteriorate the surface over time.
Regular cleaning also helps prevent discoloration and keeps your concrete looking fresh and well-maintained.
Whether it's your driveway, patio, or sidewalk, keeping these surfaces free of dirt, stains, and grime is essential for maintaining functional and good-looking concrete.
In this DIY guide, we’ll walk you through the step-by-step process of cleaning concrete to help you achieve professional results.
Equipment and Supplies Needed for Concrete Cleaning
To effectively clean your concrete, you’ll need the following equipment and supplies:
-
Pressure or Power Washer
A pressure washer rated at 3,000 PSI or higher is ideal for removing tough stains and grime.
Power washers use heat in addition to high pressure, making them a more heavy-duty alternative.
-
Stain Pre-Treatment Cleaner
Depending on the type of stain (oil, rust, mold), choose an appropriate cleaner such as Micro Clean or tri-sodium phosphate (TSP) for oil stains, or a mild acid like vinegar for rust.
-
Hard-Bristled Brush
Having a brush on hand is useful for working the cleaner into any surface stains.
-
Protective Gear
Wear gloves, safety glasses, and proper footwear to protect yourself from high-pressure water and chemicals.
Step-by-Step Guide to Cleaning Concrete
1. Prepare the Area
Sweep off any loose debris and dirt from the concrete surface. Cover any adjacent doors, windows, and painted surfaces with heavy-duty plastic or tarps to prevent unintentional damage from the pressure washer.
2. Pre-Treat Stains
Apply the chosen cleaner to stained areas and work it in with a hard-bristled brush.
Let the cleaner sit for the recommended time to break down the stains. This step may need to be done a day or two before you clean the entire surface.
3. Configure the Pressure Washer
Attach the appropriate nozzle for cleaning concrete and connect your garden hose to the pressure washer. If it’s possible to adjust the pressure settings, start with a test area and make the necessary pressure adjustments to ensure the best clean.
4. Pressure Wash the Concrete
Start at the highest point of the surface and work your way down, using an overlapping pattern to ensure even cleaning. This will help minimize dirty water from running overtop your freshly cleaned concrete.
Keep the nozzle moving to avoid etching the concrete and maintain a consistent distance from the surface to help ensure an even cleaning.
5. Seal the Concrete (Optional)
Once the concrete is thoroughly cleaned and dried, applying a concrete sealer to protect it from future stains and damage is highly recommended.
A high-quality sealer prevents water from absorbing into the concrete’s pores, which can cause it to break down during freeze-thaw cycles. It can also protect from damage due to deicing salts, oil, mold, grime, UV rays, and more.
Related Resource: Why Sealing Your Concrete Is So Important
Tips for Effective Concrete Cleaning
Use a Surface Cleaner Attachment
Using a surface cleaner attachment rather than the standard nozzle will provide more cleaning surface area to speed up the process and leave you with a more even end result.
You still may need to go over it again with the wand to rinse away the residual dirty water, but it can speed up the cleaning process.
Try a Turbo Nozzle
Turbo nozzles are highly effective in helping clean the surface of your concrete when using a wand. They can be more versatile than a standard fan tip nozzle that comes with your pressure washer.
Wear Protective Gear
Be cautious with the pressure washing equipment and chemical stain removers. Always wear protective gear, like safety goggles and gloves, to help prevent injury.
Keep Up With Concrete Maintainance
Regularly cleaning your concrete is an important part of routine concrete maintenance. This step will help prevent deep stains and prolong its life.
Cleaning Your Concrete
Cleaning concrete might seem like a daunting task, but with the right equipment and techniques, you can achieve professional results on your own.
By following this guide, you'll keep your concrete looking its best and protect your investment for years to come.
If you're not sure whether the DIY route is for you, many A-1 Concrete Leveling locations nationwide offer professional concrete cleaning services. Request a free onsite estimate with a member of the A-1 team near you!
Sarah Etler joined A-1 Concrete Leveling after receiving her Bachelor of Arts degree in English from Northern Kentucky University. As A-1's Content Marketing Manager, she works closely with industry experts to produce content that will best answer questions related to concrete repair and maintenance practices. Sarah loves living a life full of discovery and is excited every day to see what new things she can learn and share with those around her.
Topics: